Guide: Replacing a 2007 - 2013 GMC Sierra 1500 Wheel Bearing & Hub
You may not need professional help to replace the wheel bearing and hub in your GMC Sierra 1500. With the right parts and tools, you can do it yourself—and save money in the process! First, however, you’ll need to acquire the right parts for your vehicle. Use our handy tool to find high-quality aftermarket wheel bearings and hubs for your vehicle with a guaranteed fit.

Replacing Your 2007 - 2013 GMC Sierra 1500 Wheel Bearing & Hub? This is the part you need!
View productImage does not represent actual product
We’ve put together a step-by-step guide to replacing the wheel bearing and hub on your GMC Sierra 1500—but first, let’s go over what these parts do and where to find them on your vehicle.

Via Jordan Bronson on YouTube.
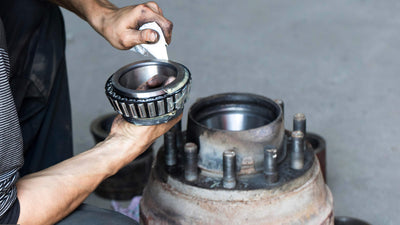
What Does the Wheel Bearing and Hub Assembly Do?
The image above shows how the wheel bearing and hub assembly are positioned for many GMC vehicles. The wheel bearing and hub sit behind the rotor, and the rotor sits behind the wheel itself.
The wheel bearing is connected to your axle and is responsible for helping your wheels rotate by absorbing friction as you drive. The wheel hub is what keeps your wheels attached to the vehicle and allows you to steer safely. The wheel hub also contains the Anti-Lock Braking System (ABS) sensor.
What You’ll Need Before You Begin
Here is a list of tools you will need before you begin to replace the wheel bearing and hub assembly:
- 2007-2013 GMC Sierra 1500 wheel bearing and hub assembly
- 15mm, 18mm, 19mm, 36mm sockets
- Ratchet wrench
- Floor jack
- Jack stands
- Lug wrench
- Breaker bar
- T30 Torx driver
 Via Liveabout.
Step 1: Use the Jack to Lift the Truck
The first step in replacing your wheel bearing and hub is to loosen the lug nuts on the tires. Once loosened, use the floor jack and locate the jack spot on the undercarriage of the vehicle. Jack the truck up and secure it in place with jack stands.
Now, you can take the tire off by removing the lug nuts completely with a lug wrench.
 Via WikiHow.
Step 2: Remove the Brakes and Rotor
The next step is removing the brake caliper. First, remove the hubcap located in the center of the wheel hub assembly. If there is rust buildup and you are unable to loosen it, you can use a flathead screwdriver to pry into the edges and remove it.
Behind the brake assembly, use a 19mm and 18mm socket with a ratchet wrench to remove the caliper bracket bolts keeping the brake caliper in place. At this point, you should be able to remove the brake caliper and bracket.
To remove the rotor, use a T30 Torx driver to release the torx screw holding the rotor in place. Once you have removed the rotor, remove the axle nut and washer in the center of the assembly that was under the hubcap you removed in step 1. If the axle nut is too tight to get off, use a breaker bar and a 36mm socket to loosen it.

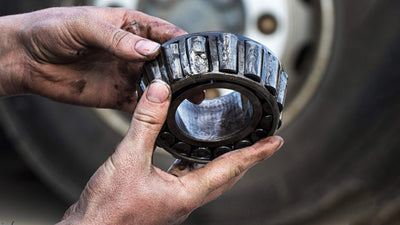
Step 3: Remove the Wheel Hub Assembly
 Via 365HubsPro.
Step 4: Place the New Hub Assembly on the Vehicle
Step 5: Put the Rotor and Brake Assembly Back On

Step 6: Put the Wheel Back On
Video Walkthrough
Get the Right Bearings & Hub for Your 07-13 GMC Sierra 1500
Share this
Explore more
Continue Reading