Guide: Replacing a 07-14 Cadillac Escalade Wheel Bearing & Hub
Your Cadillac Escalade is no ordinary SUV—it’s a luxury vehicle that deserves to be kept functional and in great shape. But if you want your Escalade to keep driving like the high-performance piece of heavy machinery it is, you’ll occasionally need to replace a wheel bearing and hub for it. Fortunately, purchasing high-quality aftermarket wheel bearings and hubs for your Escalade and learning how to install them yourself is easy, and it can save you considerable amounts of money.

Replacing Your 2007-2014 Cadillac Escalade Wheel Bearing & Hub? This is the part you need!
View productImage does not represent actual product
Below, we’ve put together a guide on how to install new wheel bearings and hub assemblies for Cadillac Escalades. Follow these instructions to ensure your premium SUV is well-equipped to tackle your next road trip in comfort, safety, and style.
Required Equipment
- 2007-2014 Cadillac Escalade wheel bearing & hub assembly
- Floor jack & jack stands
- Lug wrench
- Caliper hanger
- A torque wrench in ft-lbs
- 18, 22, T-30, and 36mm sockets
- Hammer
- Screwdriver
- Needle nose pliers
- Anti-seize
- Wire brush
Before You Start
Use a 22mm socket to loosen the wheel nuts of your Cadillac Escalade, then use your floor jack to hoist it off the ground and mount it on your jack stands.
Next, take off the wheel nuts completely and take the hubcap off, putting both the cap and nuts in a safe place so you don’t lose anything. Use a plastic pry bar or a screwdriver wrapped with a cloth to remove the hubcap to avoid scratching.
Once the hubcap is off, you should be able to view the following (matched by number to the image below):
- ABS cable (9)
- Brake calliper (4)
- Brake rotor (1)
- Wheel hub with wheel bearing inside (2)

Step 1: Remove the Brake Caliper & Bracket
You’ll need to remove the bolts holding your brake calliper and bracket in place. To do this, use an 18 mm socket.
Next, slide the caliper off and use a brake caliper hanger to secure it out of the way. Ensure this does not place tension on the brake hose.
Step 2: Remove the Brake Rotor
Use a T-30 socket to remove the screw holding your rotor in place. Once the screw is out, grab the rotor with both hands and gently but firmly slide it off. Set it aside.

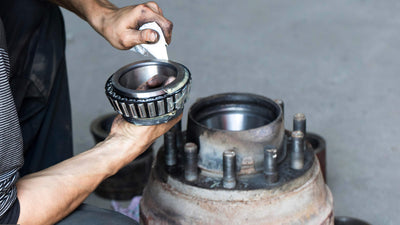
Step 3: Remove the Wheel Hub
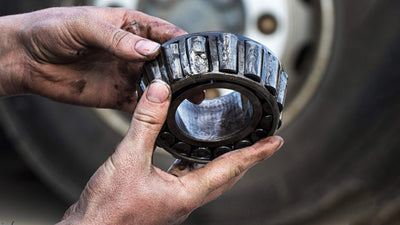
Step 4: Clean the Area around the Axle
Step 5: Replace the Hub
Step 6: Reinstall the Brake Rotor
Step 7: Replace the Brake Caliper
Step 8: Replace the Wheel & Center Cap
Replace the wheel and use a cross-pattern to torque the lug nuts to 140 lb-ft each, ensuring that the wheel is evenly tightened. Finally, replace the center cap.
Step 9: Prepare to Drive
Lower your Escalade to the ground and pump the brakes several times to get rid of the air gap between the rotor and brake pads. Congratulations: you’ve successfully installed a new wheel hub and bearing on your 2007 - 2014 Cadillac Escalade!
Video Walkthrough for Replacing Bearings on Your 2007 - 2014 Cadillac Escalade
If you need more of a visual aid to make sense of the instructions above, we recommend watching the following video:
Use Reliable Bearings & Hubs for Your Cadillac Escalade
Your Cadillac Escalade deserves diligent care, regular maintenance, and high-quality aftermarket parts to ensure that it keeps on ruling the road. Find replacement wheel bearings and hubs for your 2007 - 2014 Cadillac Escalade here, and browse our other posts to learn more about when it’s time to replace them.
Share this
Explore more
Continue Reading